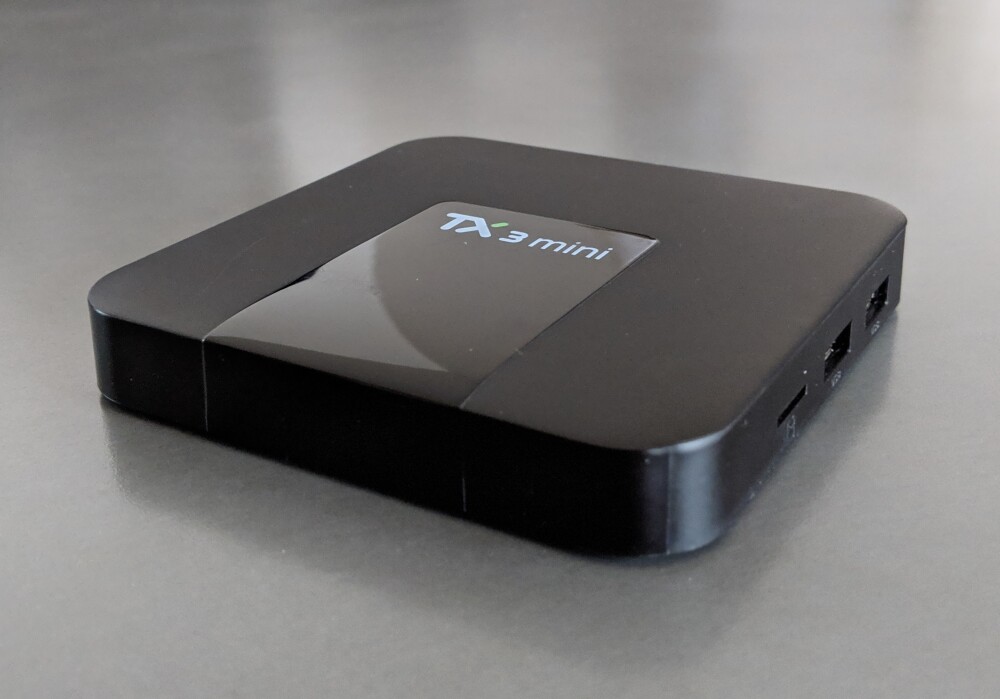
TX3 Mini: Mainline Linux on an Android TV Box
I've always found Raspberry Pi cases and the Pi's connector locations to be rather aesthetically unpleasing, with the power connector coming out from the side and the ethernet from the back (or vice versa). Imagine my excitement when I was browsing the github mirror of Linux (as you do) and I ran into a dts for an Android TV box called Tanix TX3 Mini.
Update 2019/10/13
After writing this post I bought some more of these boards and it seems there has been a new hardware revision. The bad news is that they changed the eMMC module for a NAND chip that they interface directly with. This is not supported without a custom kernel most of the time. The good news is that they seem to have changed the SSV6051 WIFI chip for a better known RTL8723BS which is in staging in Linux. This board no longer looks as attractive.
It has the following specs:
- Amlogic S905W chipset
- Quad Core 1.2GHz 64bit Cortex-A53
- Mali-450
- 1 or 2 GiB of DDR3 memory
- 8 or 16 GiB of eMMC flash
- 10/100Mbit Ethernet
- HDMI output up to 4K30P
It's also cheap enough so that I wouldn't feel bad about bricking it in my attempt to get Mainline Linux running on it. I got the 2 GiB RAM and 16 GiB eMMC model. They usually go for about $30 on AliExpress or Ebay and that's including a case (duh!), power brick, HDMI cable and an IR remote (I'm using mine to control my TV soundbar, neat!).
There are images with LibreELEC and armbian out there on forums, but they require you to hold down a small button on the board to boot from the sd card and also runs the same kernel as the original Android OS, I believe. That simply won't do!
Warning! This post is a brain dump of rather technical information, if you just want some step by step skip to recap
U-Boot
This TV box ships with Android installed and has a rather old version of Linux and U-boot. Most TV boxes that share the same chipset are based on the same reference design and include an unsoldered serial header on the board, how handy!
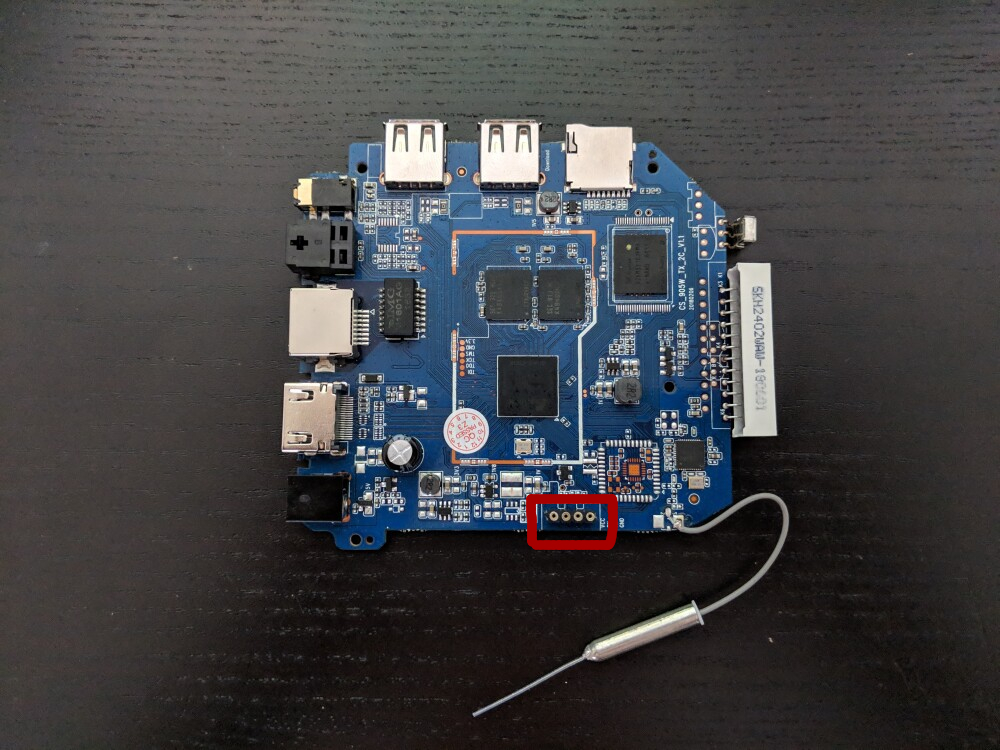
After you've soldered a pin header to the serial port and connected to it you'll see that it's running U-Boot v2015.01, yikes! This version can't boot a modern Linux image, we're gonna have to compile our own!
This proved to be more complicated than I imagined...
Bootloader stages what!?
Ok look, I'm no expert but apparently aarch64 has secure boot and it doesn't just boot U-Boot directly but in stages... 4 stages! That's 4 bootloader stages that run before U-Boot runs and in turn boots Linux. Although, one of those stages (stage 3-2) is optional and not used on our board, but 4 sounded better for dramatic effect, give me a break Karen!
The stages are as follows:
- Bootloader stage 1 (BL1) AP Trusted ROM (loaded from flash in the SoC)
- Bootloader stage 2 (BL2) Trusted Boot Firmware
- Bootloader stage 3-1 (BL31) EL3 Runtime Software
- Bootloader stage 3-2 (BL32) Secure-EL1 Payload (optional)
- Bootloader stage 3-3 (BL33) Non-trusted Firmware (this is U-Boot)
If you're interested you can read more about it here, in a lot of detail!
Missing defconfig
So, the U-Boot source code was missing any defconfig resembling tx3-mini, f%#@! But after navigating the source for a while I found a board that sounded a lot like mine!

The P212 has Amlogic S905X chipset which is a little different from the TX3 Mini's S905W. Now, it's been a few months on and off (mostly off) that I've worked on this so I don't remember exactly what steps I took to figure out that TX3 Mini is referenced from P281, but I did!
I simply made a copy of all the files for P212 and renamed them to P281, most importantly to make CONFIG_DEFAULT_DEVICE_TREE
equal meson-gxl-s905w-p281
as its dtb
is upstream and will therefor ship with distros. No need to compile a dtb manually! I have a fork of U-Boot
that includes this on a branch called v2019.01-tx3-mini.
With that done we can simply run:
make ARCH=arm CROSS_COMPILE=aarch64-linux-gnu- p281_defconfig
make ARCH=arm CROSS_COMPILE=aarch64-linux-gnu-
aarch64-linux-gnu is the name of the aarch64 toolchain in Arch Linux' repos, your distro might call it something else.
Let's get back to that secure boot thing
Remember when I talked about those bootloader stages? Well those are not bundled with U-Boot. ARM Trusted Firmware has reference implementations for some platforms, but not our board.
Looking at the README for P212 you can see it has a step by step guide for creating a complete bootloader image including all the stages, great! The repo linked to in that guide doesn't include any P281 config though, again! I did however find this one that did!
The toolchain suggested is from 2013 and I couldn't get it to work on Arch Linux and the one I used to build U-Boot earlier is too recent for this code. I ended up building it in a CentOS 7 VM as that has an ancient kernel.
Wiping the eMMC
To wipe the eMMC we're gonna need the aml-flash
tool! This tool is meant for burning the Android image to it but it does have a handy --destroy
flag that wipes the bootloader from eMMC. The reason we want this is that the SoC looks for the bootloader on eMMC before it looks at the sd card, so we need it gone! You will be able to go back to Android if you obtain an image from here
and use this tool to flash it.
All you have to do to wipe the eMMC is to go through the install instructions in the repo, find a USB Type-A to Type-A cable (stop looking, you don't have it, why would you?), plug it into the USB slot closer to the sd card on the board, the other into your computer and run:
cd /path/to/aml-flash-repository
export PATH=$PWD/tools:$PATH
./aml-flash --destroy
I made my cable by soldering a USB Type-B PCB socket I had laying around to a cut USB cable. Then I could simply use a USB Type-A to USB Type-B cable to connect to it.
You could also just solder two of them together or order one online, turns out they do exist!
That's not the memory I was promised!
Here we are, we have compiled U-Boot and created a bootloader image. Only thing left is to burn it to an sd card. You'll find the following in the README for P212 to do so:
DEV=/dev/your_sd_device
dd if=fip/u-boot.bin.sd.bin of=$DEV conv=fsync,notrunc bs=512 skip=1 seek=1
dd if=fip/u-boot.bin.sd.bin of=$DEV conv=fsync,notrunc bs=1 count=444
Now pop that sd card into your board, plug in the serial port (baud rate 115200) and look at that thing boot U-Boot! Wait, we're only seeing 1 GiB of RAM!?
After looking through the uboot-amlogic
repo for a while I found a handy variable called CONFIG_DDR_SIZE. Its value is in MiB and is currently set to 1024, now this is promising! After changing it to 2048
and re-compiling, it boots and detects 2 GiB!
Now we have a functioning U-Boot image and can move on to the next step, Linux!
You can get the pre-compiled bootloader stages in 1 GiB
or 2 GiB
format. But better yet, I also made a Makefile that builds a complete bootloader image with a simple make
command here.
Linux
Now I have some good news! Amlogic S905W has a pretty good mainline Linux support. We don't need to compile our own kernel or any of that nonsense.
We do have to take one thing into consideration though when picking a distro, the kernel version has to be fairly recent. I've had good results with 4.19+ although I could not write onto the eMMC flash until Linux 5.0. For that reason I'm picking Arch Linux ARM in this post.
Arch Linux ARM
As a user of Arch Linux this was a really natural fit for me. Arch Linux is a rolling release distro and has very up to date packages (like Linux 5.0!). Arch Linux ARM is an ARM version of it but it is not maintained by the same people as the original Arch Linux.
Preparing an sd card is fairly straight forward:
- Download ArchLinuxARM-aarch64-latest.tar.gz
- Partition sd card (this can be a single root partition)
- Format that root partition as ext4 (make sure it has label
linux-root) - Mount that root partition
- Extract the Arch Linux ARM rootfs onto the partition
- Burn the bootloader to the sd card (like talked about in previous section)
- Finally write the following in
/boot/extlinux/extlinux.conf
menu title ArchLinuxARM Boot Options.
timeout 20

label ArchLinuxARM
        kernel /boot/Image
        initrd /boot/initramfs-linux.img
        append rw root=LABEL=linux-root rootwait rootfstype=ext4 coherent_pool=1M ethaddr=${ethaddr}
        fdtdir /boot/dtbs/
The paths are relative to the first partition. So if you have a separate boot partition that is then mounted under
/bootin the root, make sure it's the first partition and drop the/bootprefix from all the paths inextlinux.conf. This boot partition will also need to be added manually to fstab inside the rootfs, if you like kernel updates.
After that fiasco is done you can pop that sd card into your board and watch as that glorious Arch Linux ARM boots. You can find more information such as default passwords and services in the Arch Linux ARM docs.
Now you can enjoy the world of tomorrow with Arch Linux ARM! Except, there is a problem.
More U-Boot stuff!?
So, on properly supported hardware U-Boot can load the MAC address from NAND flash or something fancy like that. But that's not how we roll around here!
The reason this is a problem is that if U-Boot can't load the MAC address from hardware it will just say "fine!" and make up its own, on every single boot. If you don't reboot it very often or use a static IP address this might not be a problem but on every boot it will get a new DHCP lease. U-Boot no longer supports hardcoding it in the config, as MAC addresses are suppose to be globally unique, so lets work around that.
Ok so, here's how the the process works after you've booted into U-Boot.
- It looks for
extlinux.confin/extlinuxand/boot/extlinux - It looks for a
boot.scrscript in/and/boot - It looks for
/efi/boot/bootaa64.efibinary - It tries to DHCP/PXE boot
Each step is run on every bootable medium (sd card, eMMC and then USB). If it finds one it tries to boot it and if it fails it moves to the next one.
U-Boot has an environment of variables that are generated on compile time or populated on boot time, like ethaddr
when possible. ethaddr
is the MAC address of the first ethernet interface (followed by eth1addr, eth2addr
and so on) but in our case this variable doesn't exist. The boot.scr
script can manipulate the environment but as we can see the extlinux.conf
step runs first, gosh darnit!.
This is not a new idea but wasn't implemented in the P212 config. I added a preboot step that tries to load additional environment variables from a file named uEnv.txt
in either /
or /boot
in the first partition of the sd card and eMMC.
So echo "ethaddr=12:34:56:78:9a:bc" > uEnv.txt
should do the trick, but you know, with an actual MAC address (mine is printed on the bottom of the case).
Flashing it to the eMMC
So running from the sd card is cute and everything, but we have a 16 GiB eMMC flash that we can use instead! And besides, sd cards are horrible for writing to a lot and will fail soon anyway unless you run your system from ram, but that's not the subject of this post!
To get it running off the eMMC flash you could simply repeat the steps above, but that takes time and who wants that? Instead I ~~wasted~~ spent time on creating a script that does all the steps for me and outputs an image that we can simply burn to the sd card and then the eMMC flash.
That script can be found here. The final image also includes the bootloader.
Recap
If you don't care about the process it took me to get here and want step by step instructions:
- Clone tx3-mini-arch-linux-build
- Run
./genimage.sh - Wipe the eMMC
- Burn the image onto the sd card (
dd if=ArchLinuxARM-tx3-mini.img of=/dev/your_sd_card bs=1M) - Get ArchLinuxARM-tx3-mini.img onto your sd card or scp it to your running TX3 Mini
- Burn the image onto the eMMC from the running sd card setup (
dd if=ArchLinuxARM-tx3-mini.img of=/dev/mmcblkX bs=1M)
The generated image is 2GiB. After flashing it to the eMMC the partition needs to be enlarged manually. You can google that, I'm not your mom.
Final words
That concludes our journey through thick and thin of getting mainline Linux running on the TX3 Mini. I haven't played at all with getting WIFI working, it has an SSV6051
chip which does not have a driver in mainline Linux and a quick google search doesn't give me much.
Another thing is that the board has a 7-segment display where it can show the time or whatever you want (as long as it's not more than 4 numbers) and some icons, image search "TX3 Mini" and you'll see what I mean. This is controlled by an FD628 controller which does give me some results when googling for a driver (linux_openvfd) but I have not tried that one either.
Finally, the HDMI does work, though I haven't tried it for anything more than displaying a console. There is a driver for the GPU in Arch Linux ARM's repo.
Now I can proudly plug my new ARM SBC into my network and use it as a server (or something). Lets throw it in the closet where no one can see it, making my point about aesthetics moot. But hey! It was fun figuring this out.
Discuss on Hacker News or Reddit